Monday, October 29, 2007

Invasion of the undead bunnies

It's the Zombie Bunny jumbo plushie magnet! Now available in two scary heart attack inducing versions, regular and stitched mouth. They are available here for $14. And remember, there is nothing more frightening than a cuddly bunny that hungers for flesh!
Zombie Bunny plushie magnet
Invasion of undead bunnies!
Zombie Bunny Magnets


Holiday Craft Show, Bethesda, MD


Man of Etsy, Michael Auger, will be participating in the DC Craft Mafia's "The UnUsual Suspects Holiday Arts and Crafts Show" Saturday November 3rd from 12 noon-8pm at 5020 Battery Lane in Bethesda, Maryland.

For details visit:
www.DCCraftMafia.com

Wednesday, October 17, 2007

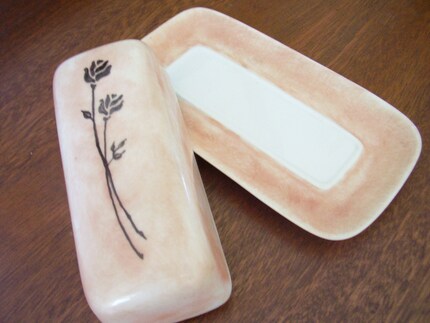
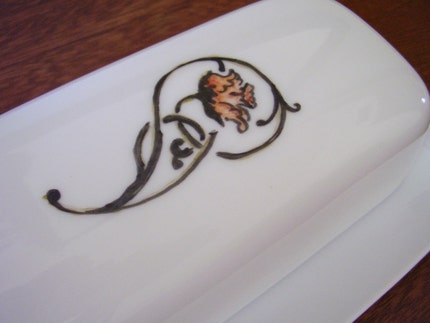
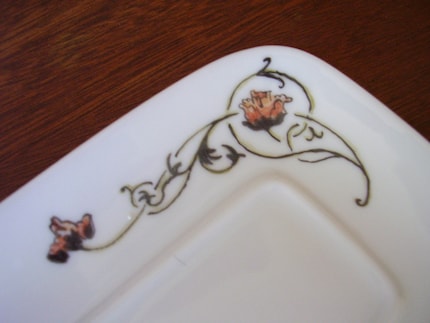
Not Your Grandmother's Butter Dish - Or, Maybe It Is!

Hi everyone – as unaccustomed as I am to public blogging I thought it imperative to “toot my own horn” and show off these butter dishes. For those of you who are unfamiliar with my work allow me to explain just a bit. Among other things, I am a china painter. I do not make the porcelain pieces, I buy them. When I buy them they are plain and usually white although I have been known to paint on pieces that came “pre-equipped” with a coloured glaze. I found these butter dishes the other day and bought all that they had at the store (five in total). These are the first two I have finished. Although both incorporate floral designs they are quite different in style. If you should choose to peruse them in my etsy shop you can read about them there and discover more about why one is being offered at a “FIRE SALE” price. For this post I will limit my narrative to this much and put up the photos for you to peruse– thanks for looking. tnkerr.etsy.com


Friday, October 12, 2007

New Notecard Set listed on Etsy


These arrived in the mail today. Set of 4 notecards with envelopes, 4x5 inches. Blank inside and the envelopes are white. Professionally printed onto cardstock with a glossy coating.
Click here to go to the etsy listing.

Tuesday, October 9, 2007

Yupo Boards, 5x7 inches, Set of 3


I was making some yupo boards for myself, and pressed a few extra.

Yupo paper is dry mounted with thermal activated , acid free adhesive to hardboard. The finished painting can be sealed with varnish and framed without a mat or glass. You can also leave the painting unframed and display it on a small tabletop easel.

Boards are also available with 140 lb. Arches cold press watercolor paper. In my Etsy Store.

Saturday, September 22, 2007

Visit Kansas!


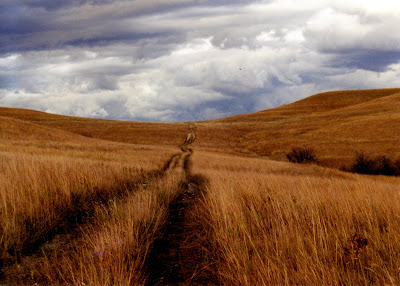
If you're like me, you're always thinking about travelling and future vacations. I realize that many people drive *through* Kansas each year and get very little pleasure out of doing so, so I decided to propose a wonderful stop to make along I-70 in Northeast Kansas: the Konza Prairie.


The Konza is a research area carved out of the gorgeous Flint Hills. It is owned by the Nature Conservancy and used by Kansas State University to learn about prairies. Most of the Konza is off-limits to the public, but part of the area has hiking trails available to regular folks like you and me, and that's where all of these photographs come from.


Sunrise Over Konza

The Konza is beautiful in all seasons. If you come during the summer, I encourage you to try to get out early in the morning or in the evening, because Kansas summers can be hot and muggy. If you can make it in the early summer, you have a chance to see colorful wildflowers.


Wildflower
Wildflowers

I Love Wildflowers


Another advantage to visiting in the early morning is the chance to see wildlife. It is common to see white-tailed deer and wild turkey here, as well as many other types of birds.


Breakfast


One particularly interesting part of the Konza - to me, anyway - is that the prairie is periodically burned. Researchers burn different parts of the prairie at different rates. Some sections are burned each year, some less often. I've never read any of their findings, but I love to do a bit of observation on my own. It's fascinating how quickly the prairie reseeds itself and comes back to life. The rebirth process is gorgeous, and I love the smell of the freshly burned prairie.


Burn Border / Walking Trail
Burned Limestone
Rebirth


To visit the Konza Prairie, take exit 307 off of I-70 [it's the exit in between the two main Manhattan/K-State exits] to McDowell Creek Road. Then travel four miles south until you see the sign that says Konza on the right side of the road. A short trip down a gravel road will take you to the hiking trails parking lot.


For more information, visit the official website. And, of course, you can find more photographs in my Etsy shop: http://JaredKS.etsy.com


Kansas may not be most folks' idea of a vacation destination, but if you're driving through anyway, consider a stop at the Konza. It's grassland at its finest.

Friday, September 7, 2007

Hearts... A how to guide

Ok, so I'm ready to post my first "How To" blog. It's not chainmail though, it's Hearts. This is your how to guide to making sterling silver hearts for jewelry.


Supplies required:

16 gauge sterling silver wire (If you want to practice first, use copper)
jeweler's saw and size 0 saw blades
One square needle file
Soldering equipment (Torch, flux and hard or medium solder).
Jeweler's pickle
One pair of round nose pliers
One pair of flat nose pliers (optional)
Wire cutters.


Step 1

Cut a piece of 16 gauge sterling silver wire. In this case the wire used was 5 cm long.

Step 2


Using a squre needle file, file a notch in the center of the wire.

Step 3

Bend the wire accross the notch so that the gap closes. Stop at about a 90 degree angle. Flat nose pliers helps but are not necessary.

Step 4


Switch to round nose pliers. Hold the 'L' shaped wire at the notch and bend around one side of the round nose pliers. This is the first half of the heart.

Step 5


The wire should now look like the first image. Bend the second half down to match and allow the ends of the wire to overlap. The overlap should be directly under the filed notch. (image 2)

Step 6


Make several of these and place one over a notch in the bench pin.

Step 7

Using a jeweler's saw cut through the overlap. And ALWAYS save the scraps. (I use an old film container for this).

Step 8


Adjust the bottom of the heart so that the ends meet without gaps.

Step 9


Flux and solder the hearts where they were notched and where the ends of the wire meet. After soldering Clean with pickle.

Make as many as you want! They can now be hammered, filed, sanded, polished and otherwise manipulated for jewelry. :)


Find heart jewelry in my shop at http://www.jasonsjewelry.etsy.com

.